Optimizing Gingival Health and Prosthetic Stability with Screw-Retained Restorations by Dr. Igor Skvirsky
Featured products
The patient presented with a characteristic complaint, which became more frequent after October 7.
Due to chronic stress, many patients experience fractures of teeth, crowns, bridges, and restorations.
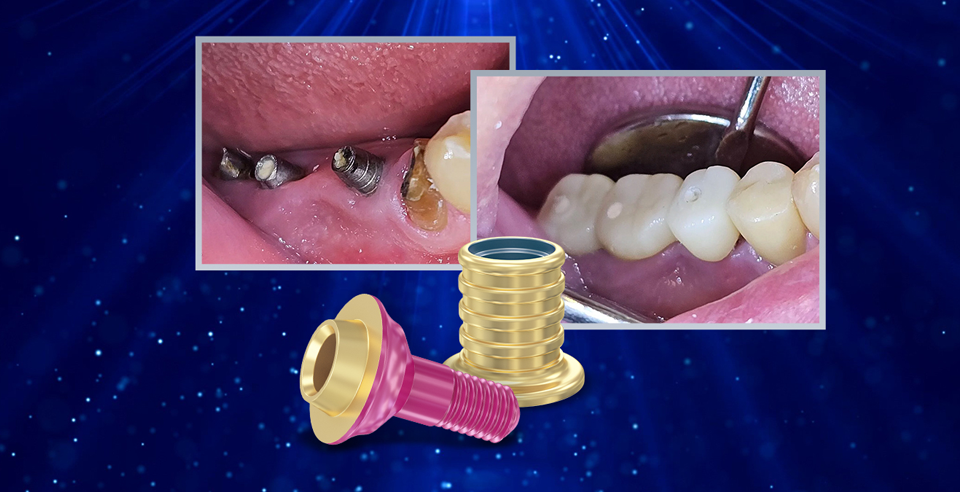
The crown on tooth 45 had fallen off, and mobility was noted in the bridge supported by implants at teeth 46, 47, and 48.
Root canal treatment was performed on tooth 45, followed by a core build-up and crown. I decided to replace the implant-supported bridge. Although the emergence profile was oval, the implants were nearly exposed, and the gingival condition was unhealthy. This was an old bridge that had been cemented over 10 years ago.
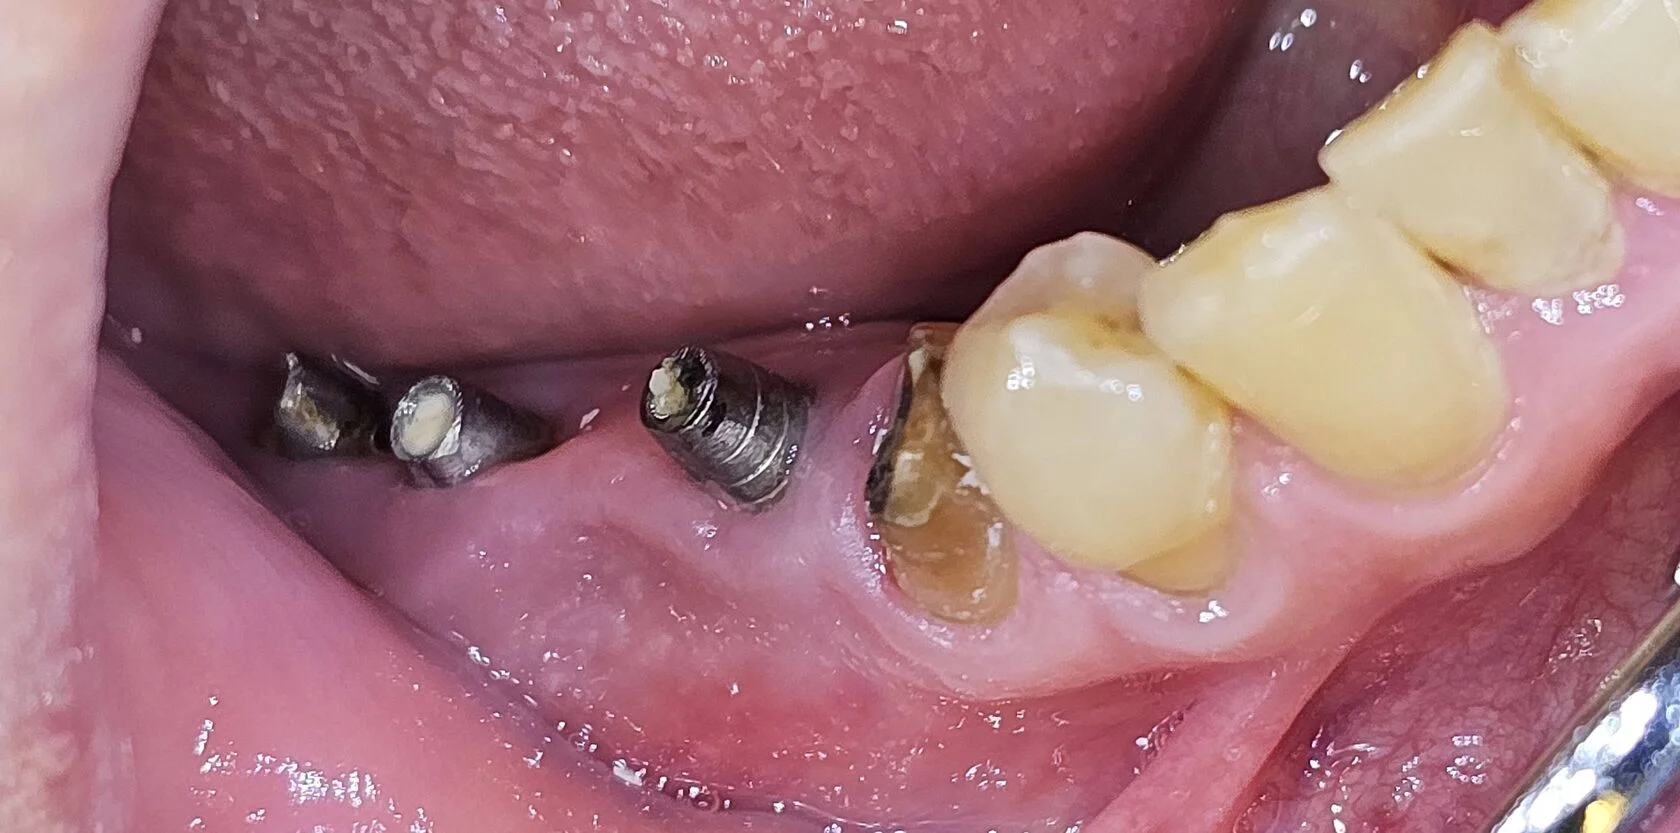
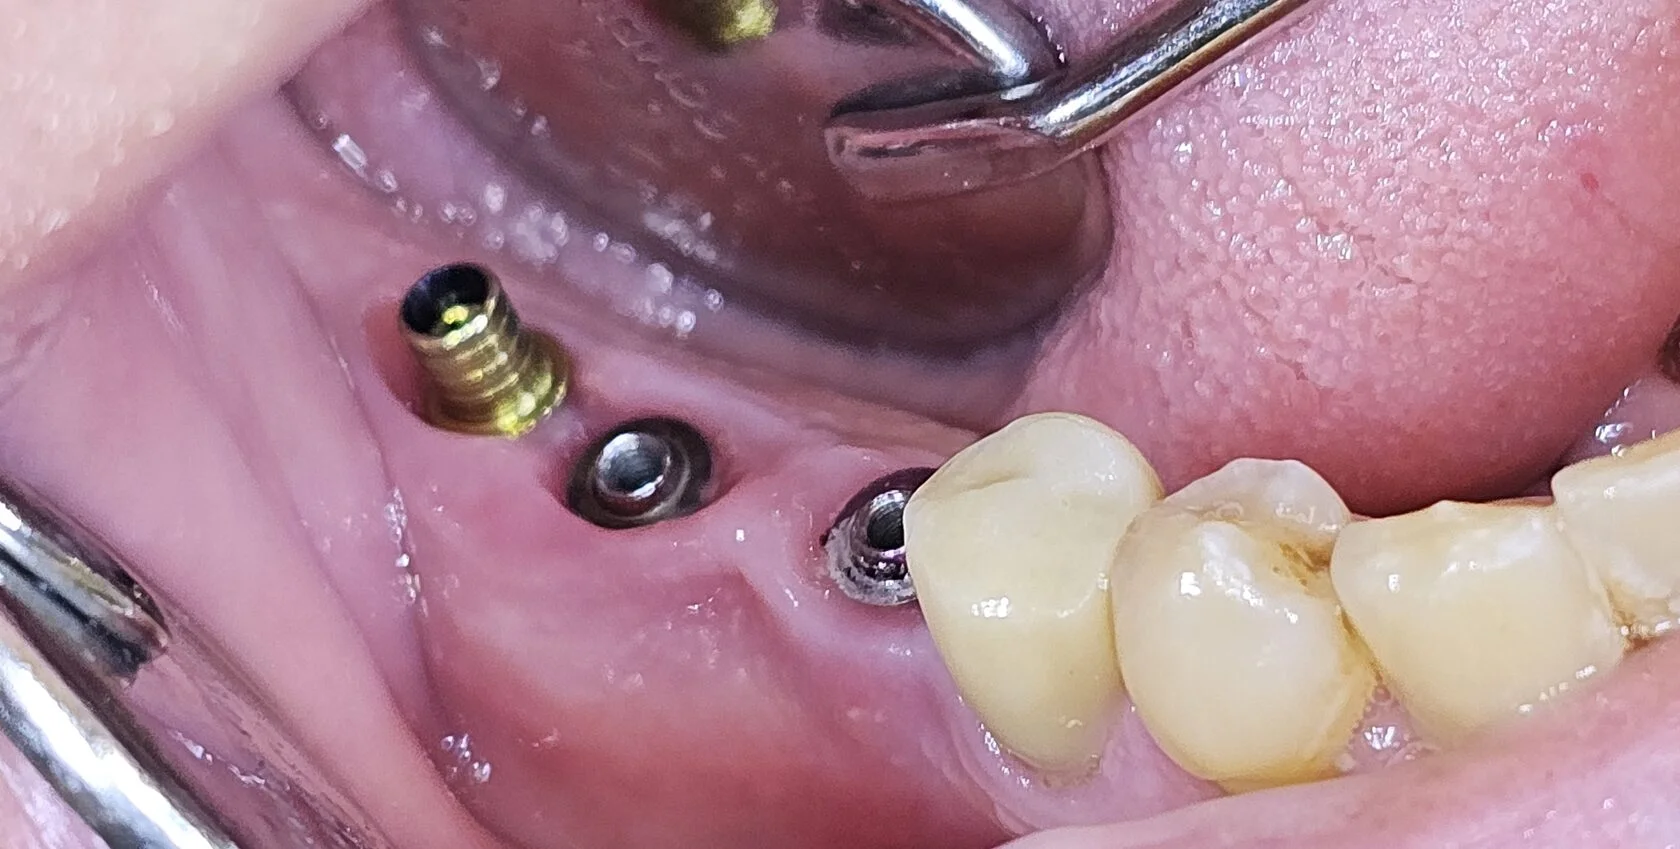
I opted to replace the bridge with a screw-retained structure and removed the abutments.
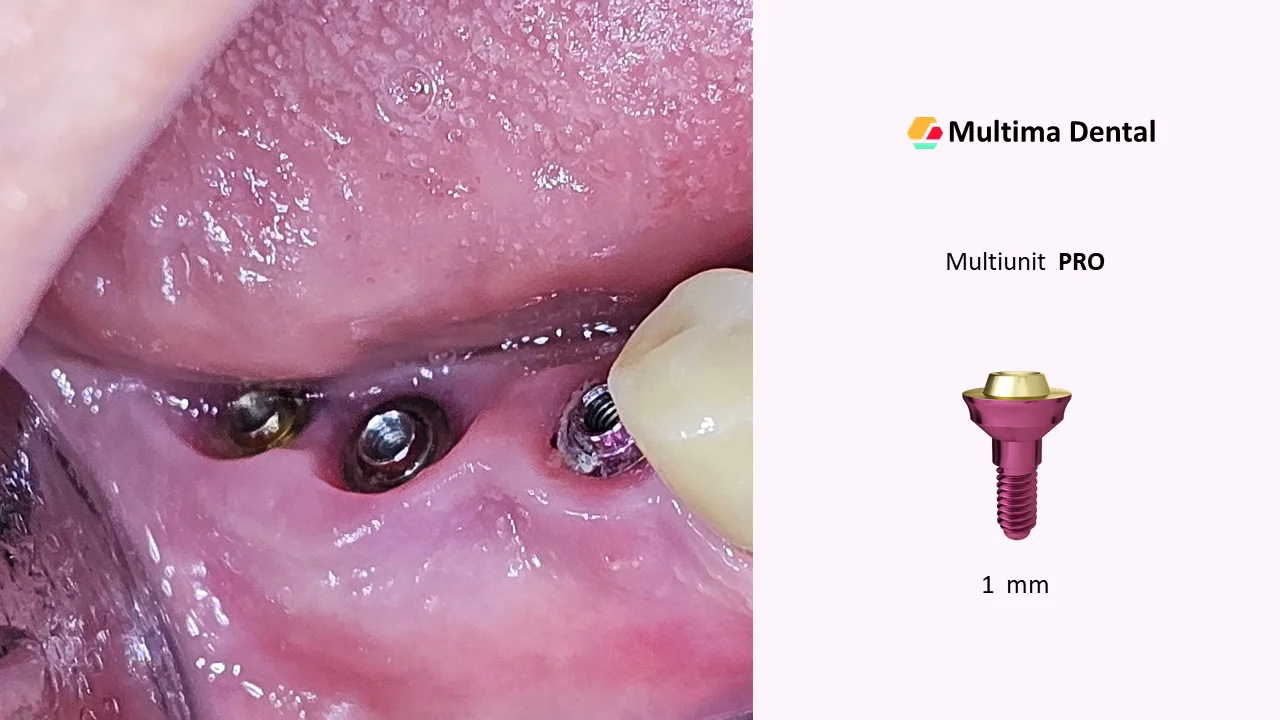
Multi-units from Multima PRO were placed.
There was a dilemma regarding the height selection of the multi-units – 1 mm or 2 mm – due to the oval emergence profile.
After evaluating the occlusion, I determined that the crowns would be too low, so I chose to use 1 mm multi-units.
If the height of the crowns had permitted, I would have used 2 mm multi-units.
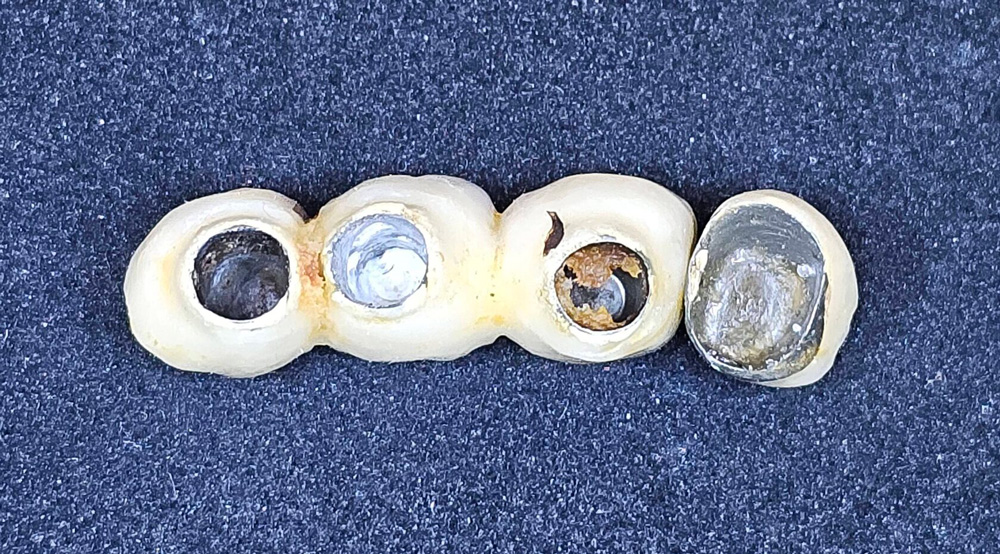
I instructed the technician to fabricate a temporary bridge with wide screw access channels to demonstrate the difference between wide and narrow openings.
It had been a long time since I worked with this type of structure, and now I realize how inconvenient it is.
It’s clear why many clinicians avoid intraoral bonding of sleeves – it’s truly uncomfortable.
However, when this work is done on a model in the lab, full passivity is not achieved.
As a result, screws loosen, and crowns or implants may fracture.
I’ve been seeking a solution to this issue for a long time, and I believe the protocol I developed is simple:
Any clinician can follow the guidelines and achieve passive bridges.
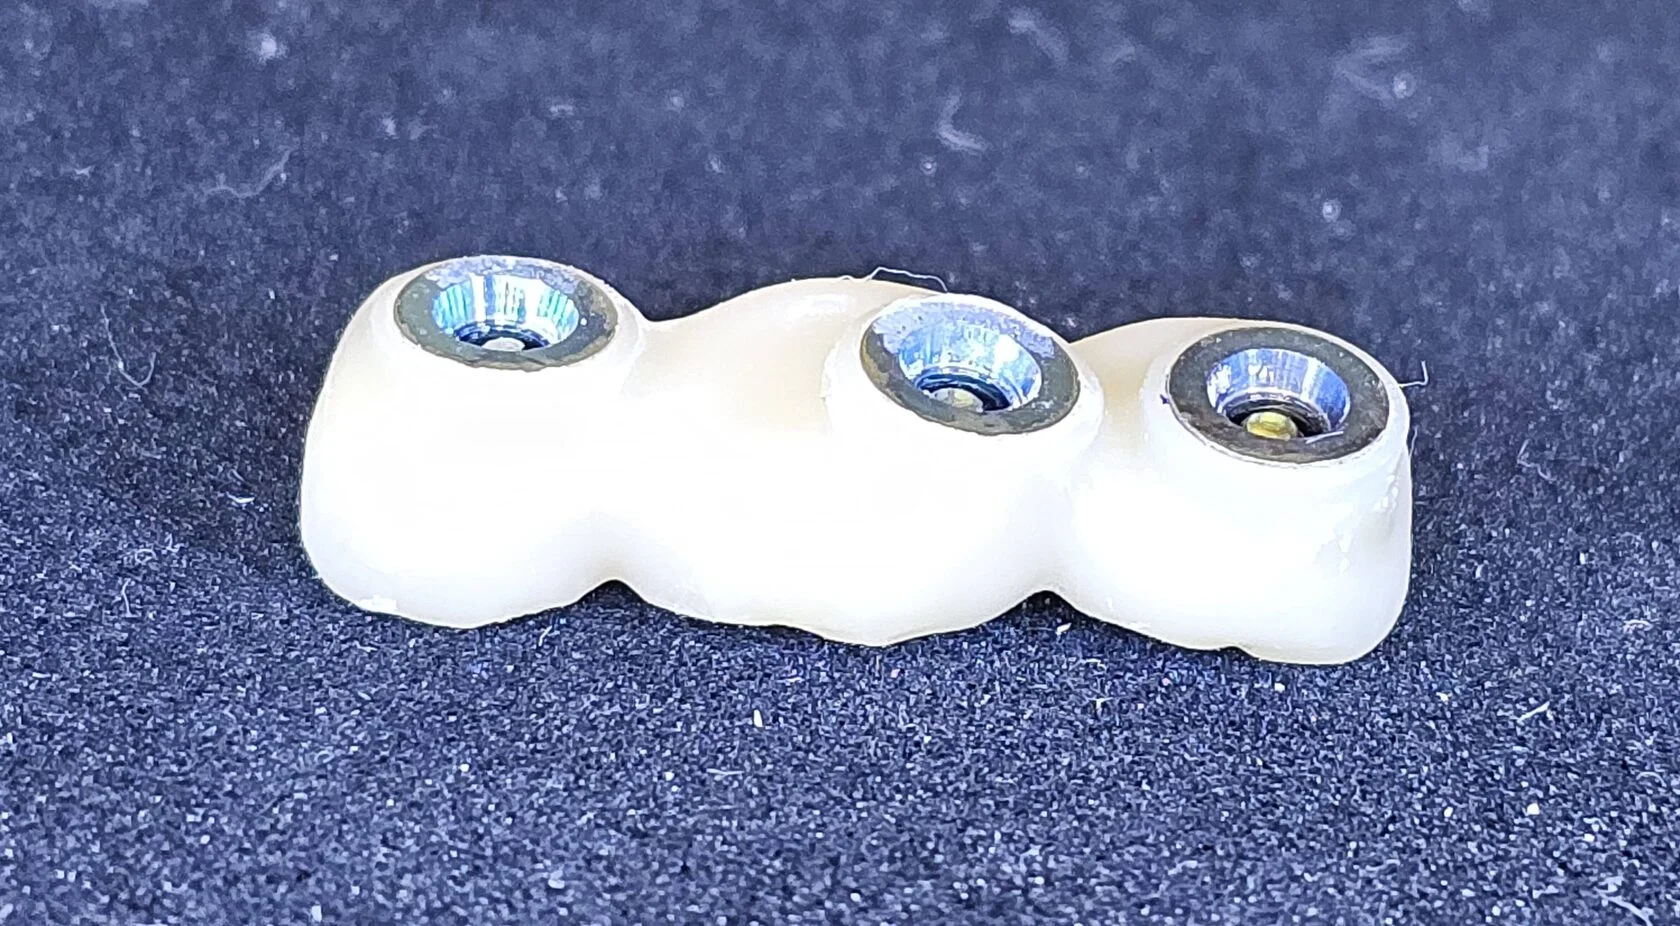
Working with narrow access channels is significantly more comfortable.
Screws do not fall out, and the sleeves are stabilized securely.
Additionally, intraoral bonding is much easier, ensuring maximum passivity of the bridge.
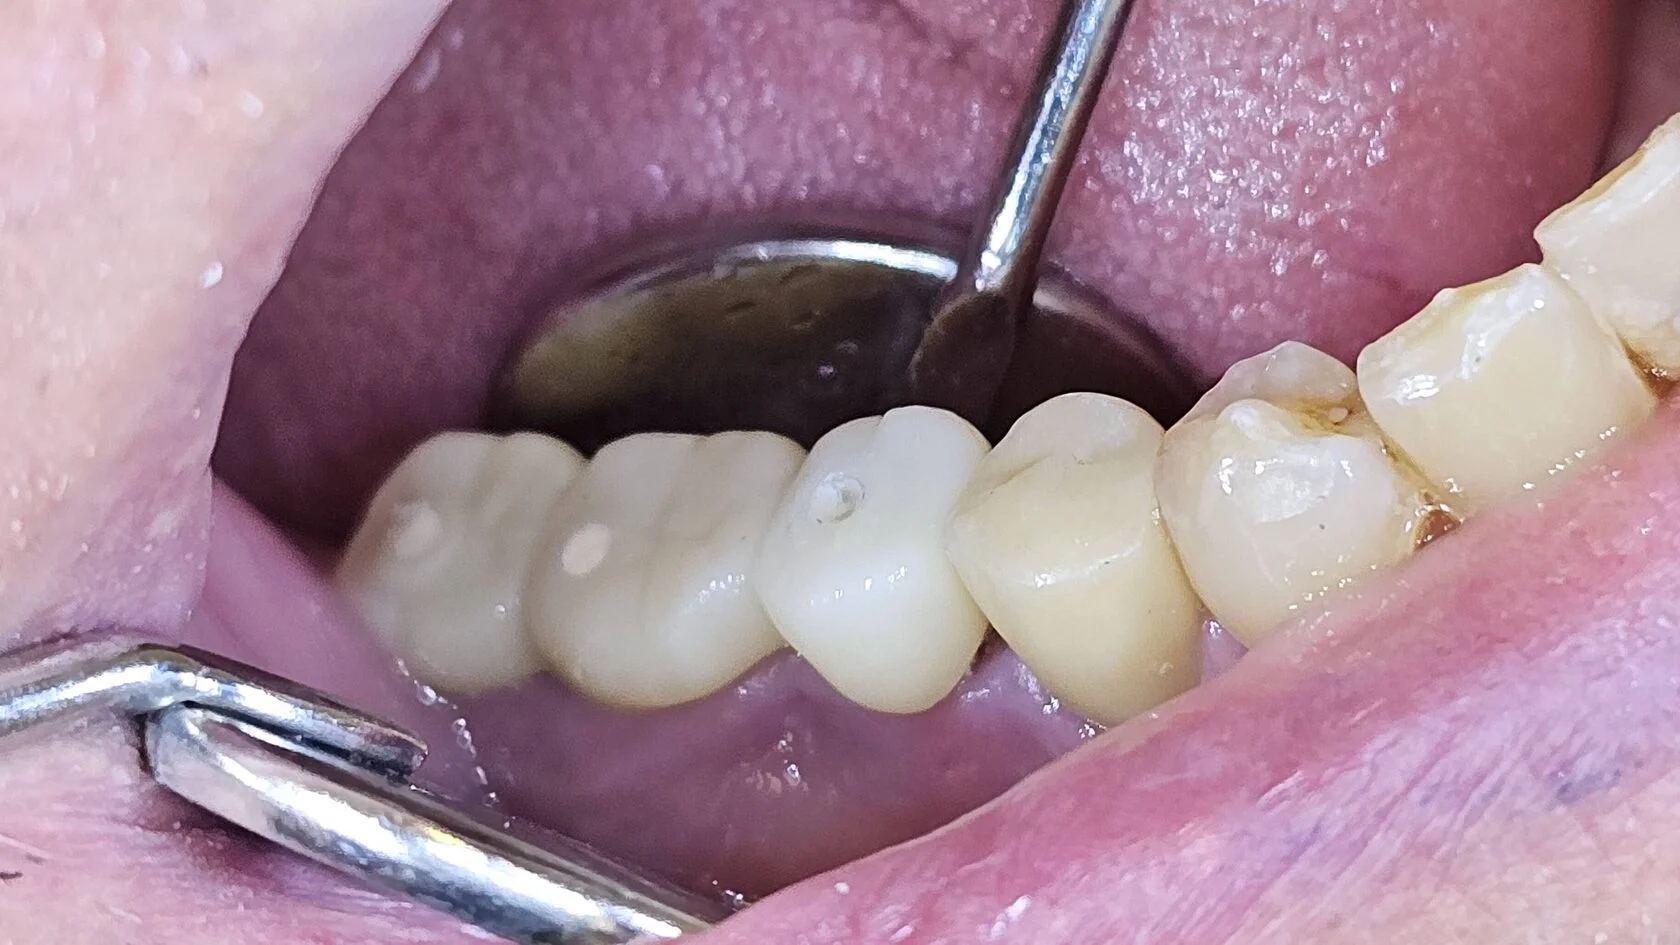
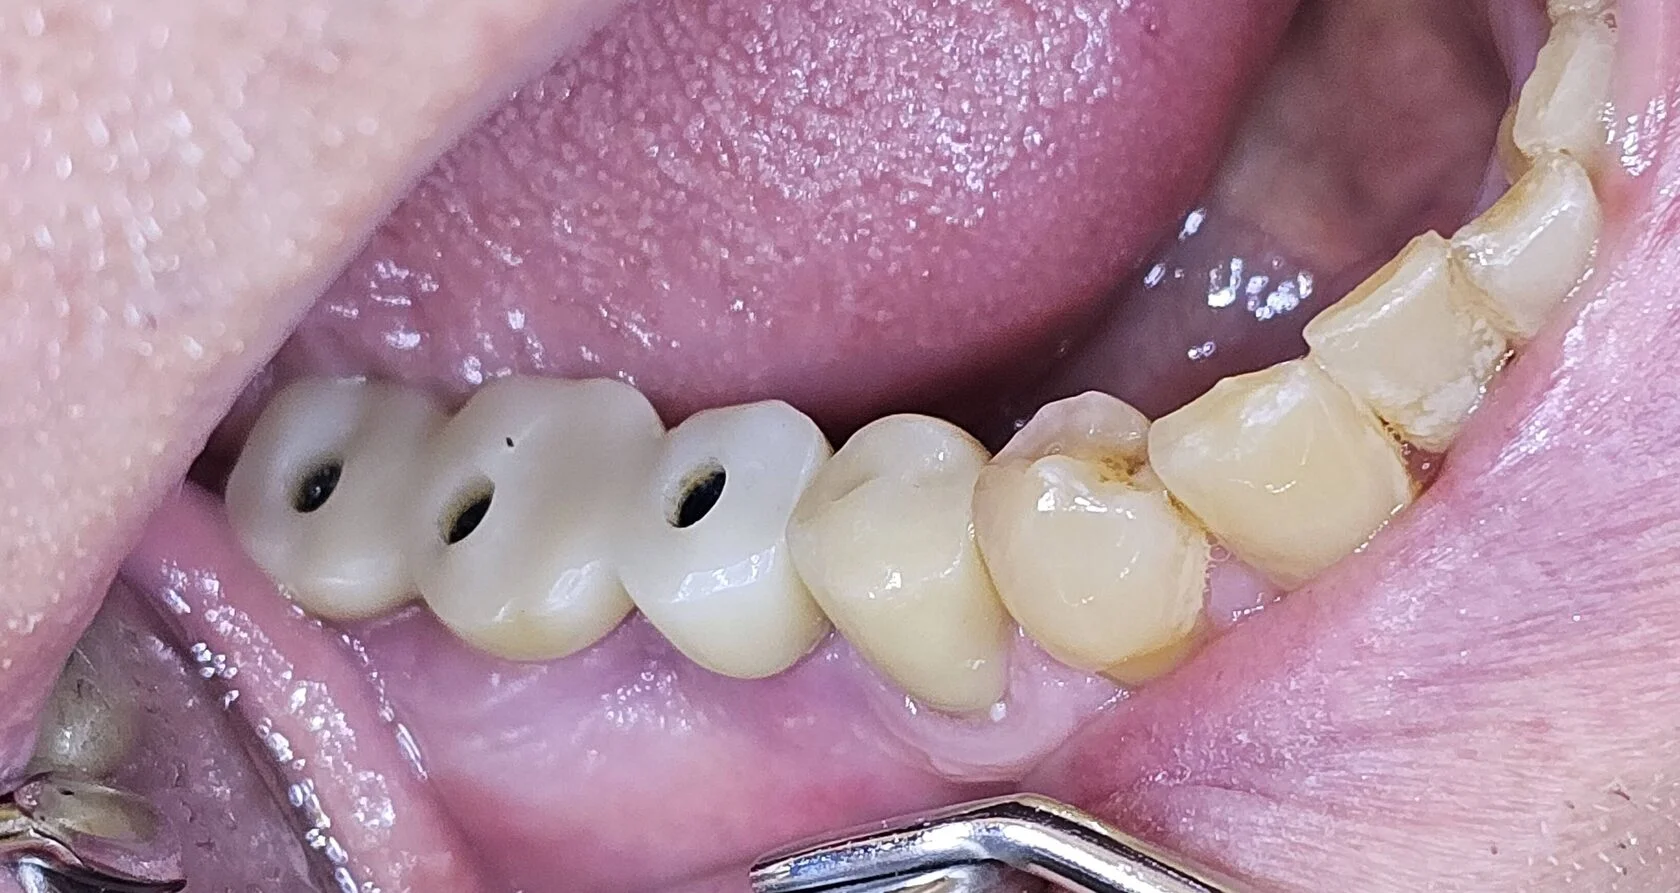
Note the improved condition of the gingiva – it appears much healthier, as there is no longer pressure from the crowns on the soft tissue.
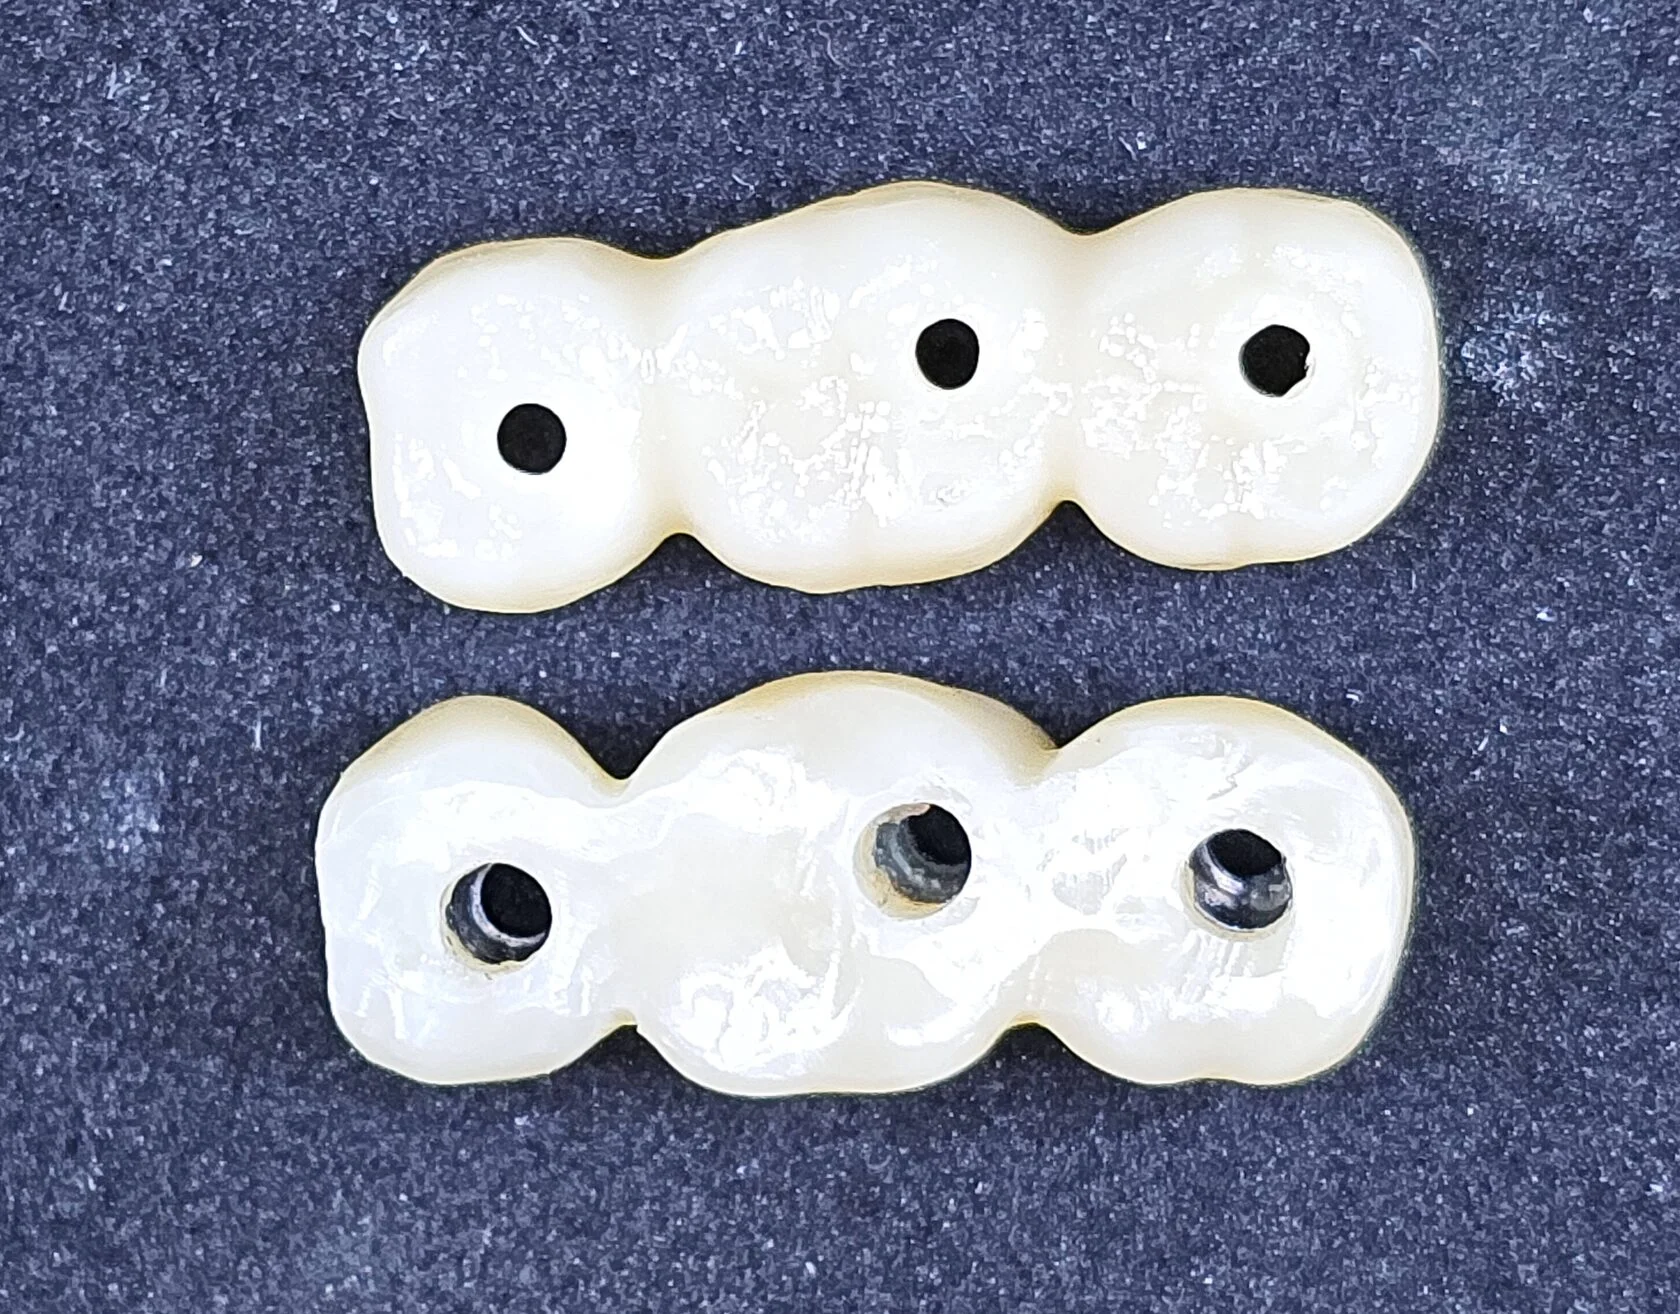
I asked the technician to fabricate another bridge with narrow access channels.
Observe the difference between the bridges.
The new structure is both more aesthetic and durable.
Bridge installation was carried out according to my protocol.
I prepared all components and marked the position of the master sleeve on the bridge using a marker.
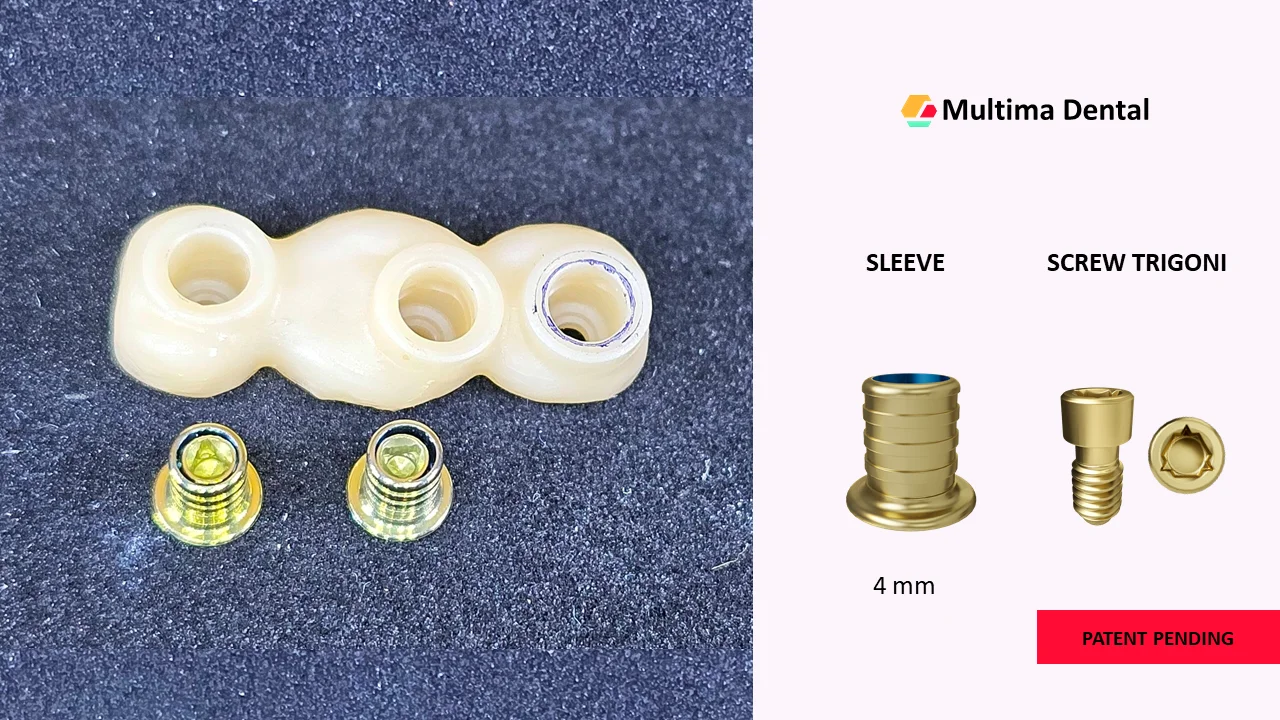
I connected the master to the most distal implant – it served as a guide and held the bridge in position during placement.
I bonded the sleeves to the bridge, and only then seated it intraorally.
After light curing, I unscrewed the bridge and the master sleeve.

Next, I bonded the master to the bridge and reattached it to the multi-units.
The pre-bonded sleeves allow precise adaptation of the bridge to the multi-units intraorally and ensure definitive positioning.
The small screw access openings greatly facilitate the procedure – screws remain in place during installation.
After additional light curing, I removed the bridge and cleaned off any residual cement.
I then screwed the finalized bridge into place.
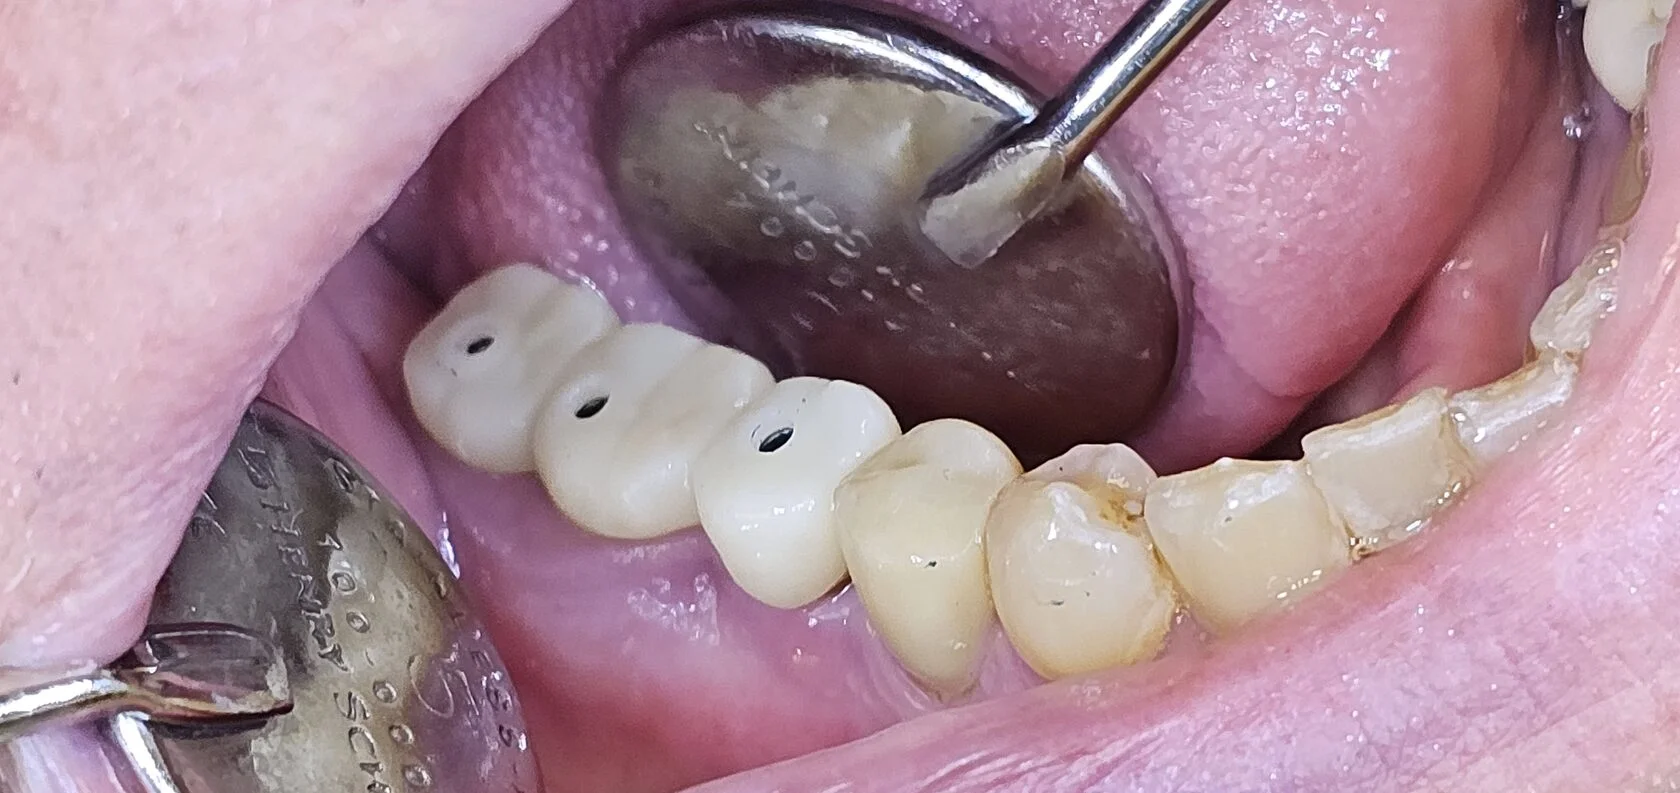
The access openings were sealed with polymer pins.

Here is the final result.